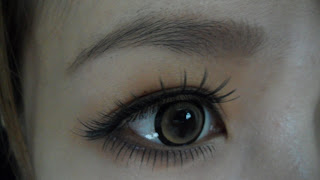
Do you have boxes and boxes of falsies like me cos they're so cheap? 1 box has 10 pairs and it only costs $2.90 from SGLADY.COM!

However, cheap eyelashes can never look as nice as Japanese eyelashes :( So I stack them to make them look more expensive and pretty!
Method 1 (for gradient eyelashes):
You need 4 eyelashes for this. 2 base pairs and 2 different eyelashes (to be cut into half as shown).

Using this as the base eyelash, apply eyelash glue on the middle area

Paste half of the semi thick eyelash on the middle

Apply half of the thick eyelash at the end and you're done! Looks japanese right? And it'll only cost you $1.16 for 1 pair instead of $6+ if you buy eyemazing!

Method 2 (for thicker ends):
You need 4 eyelashes for this. 2 base pairs and 2 different eyelashes (to be cut into half as shown).

Using this as the base eyelash, apply eyelash glue on the middle area

Paste half of the semi thick eyelash on the middle

Apply half of the thick eyelash at the end and you're done! Looks japanese right? And it'll only cost you $1.16 for 1 pair instead of $6+ if you buy eyemazing!

Method 2 (for thicker ends):
You need 3 pairs of eyelashes for this. 2 base pairs and 1 thicker eyelash (to be cut into half).

Apply glue on half of your base pair of eyelashes.

Paste half of the thicker pair of eyelashes at the end of the base pair and you're done! Total cost = $0.87!!

Method 3 ( for dramatic looking eyes):
You need 2 pairs of different eyelashes. Actually I wasn't trying to create more volume, I felt like the top pair of eyelashes were too short so I chose a longer pair of natural looking falsies to lengthen them.

Just paste them both together and you get drama queen eyelashes! Some people even stack 3 or 4 pairs on top of each other, how dramatic you want your eyelashes to look is up to you :)


Apply glue on half of your base pair of eyelashes.

Paste half of the thicker pair of eyelashes at the end of the base pair and you're done! Total cost = $0.87!!

Method 3 ( for dramatic looking eyes):
You need 2 pairs of different eyelashes. Actually I wasn't trying to create more volume, I felt like the top pair of eyelashes were too short so I chose a longer pair of natural looking falsies to lengthen them.

Just paste them both together and you get drama queen eyelashes! Some people even stack 3 or 4 pairs on top of each other, how dramatic you want your eyelashes to look is up to you :)


